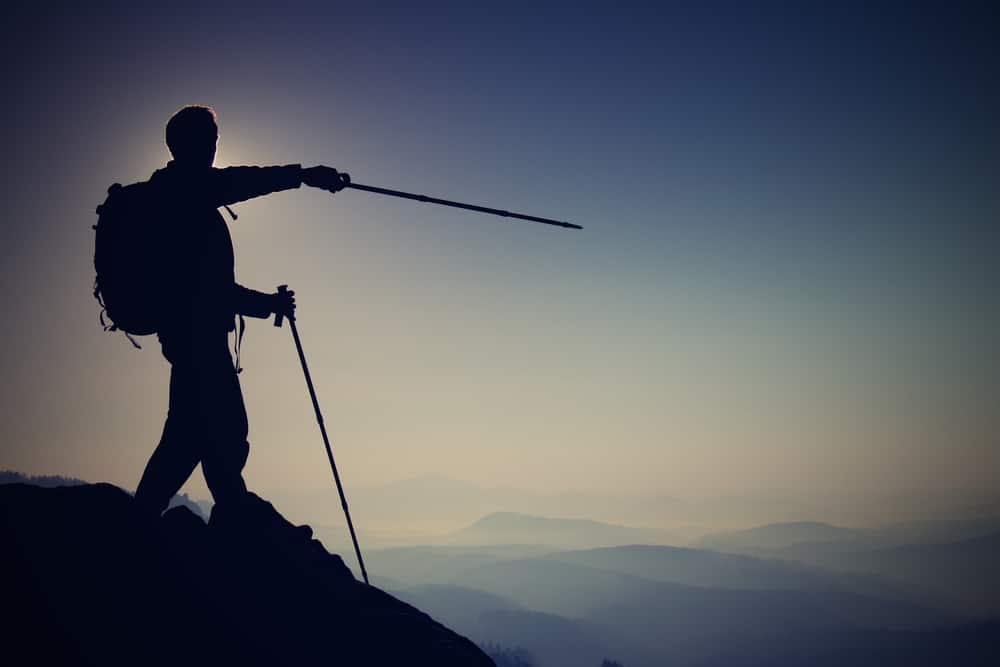
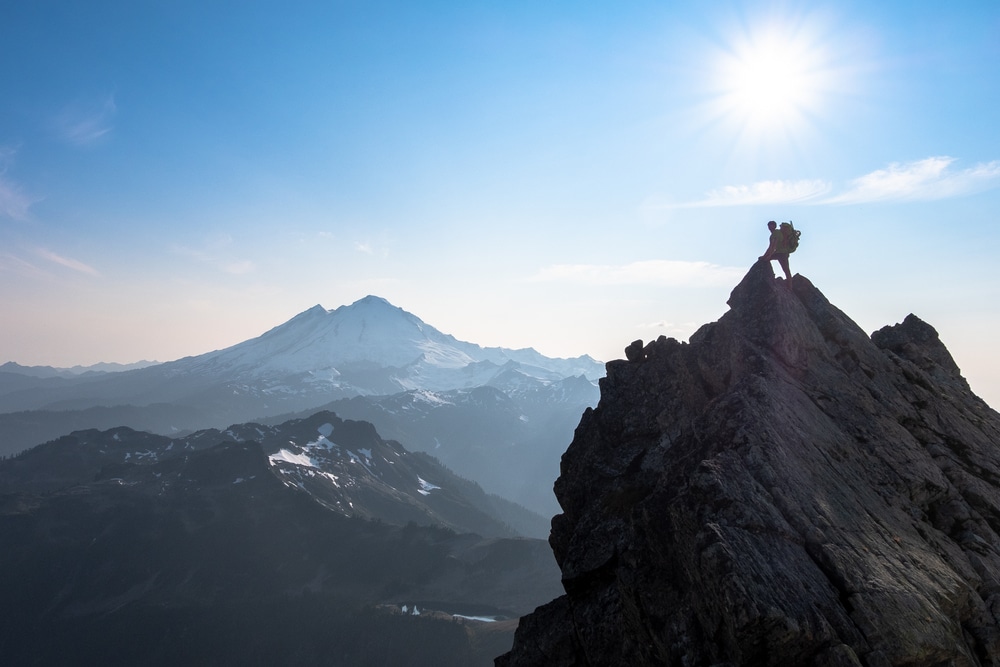
Picture this: You, balancing on the pinnacle of the North Cascades’ most active volcano, boundless views of mountains like Shuksan and the Mt. Baker-Snoqualmie National Forest splayed out in all directions, breathing the crisp thin air, seemingly on top of the world. These are just a few aspects of the splendid glory alpinists intrepid enough to summit Washington’s third-highest peak get to enjoy.
Summiting Mt. Baker is the perfect life-defining moment that can only be made better by having a luxurious vacation chalet waiting to rehabilitate you afterward! It’s no walk in the park to the top, but every arduous and painstaking step up is one towards the very glory of the North Cascades’ crown jewel, the summit of Mt. Baker.
Summiting Peaks in Washington
Adventure is the spice of life. Not all of us are interested in planning a relaxing getaway in the mountains. Sometimes you want to push the very limits of what you are capable of! You want to accomplish something, something adventurous.
In the Pacific Northwest, the most adventurous of explorers hit the mountains. The 10,000-foot peaks scattered across the Cascade mountain range are the most technically challenging and physically imposing. Therefore these are naturally the most enticing.
At its highest point of 10,781 feet, Mt. Baker is one of the most impressive PNW peaks to attempt to summit. It is also a popular hiking destination in general from central cities like Bellingham and Glacier.
About Mt. Baker
Topping out at 10,781ft, Mt. Baker is the second most glaciated stratovolcano in Washington, rivaled only by iconic Mt. Rainier, but arguably with a prettier climb.
Since its first successful summit in 1868, “Baker,” as it’s called locally, has attracted alpinists from the state and the world to its steep slopes. The heavily glaciated peak offers climbers, old and new, a plethora of routes with varying degrees of difficulty.
Although I’ll briefly cover the most popular routes here. It’s known as a great place for people to begin learning mountaineering and is an approachable yet challenging place to learn both technical ice climbing and high-altitude camping.
But that doesn’t mean the challenge should be taken lightly. Baker is covered in dangerous crevasse and opportunities for disaster. This post will help guide you toward preparation, no matter your mountaineering skills, before your potential summit.
Best Time of Year to Climb Mt. Baker
Short answer, the summit is open year round. That said, the midsummer months of July and August are the most optimal time to attempt a summit due to the lack of rainfall and the warmest temperatures ranging from 50F to 60F at the base of the mountain.
Shoulder months like June and September can also have favorable conditions for climbers of all skill levels.
Climbing Seasons
Many aspiring mountaineers get their crash courses in avalanche and crevasse rescue training in spring and fall. These months see more rainfall and colder temperatures making it more difficult and varied conditions that are ideal for intermediate and advanced mountaineers refining their skills on the slopes around the base of the glaciers.
The winter months are reserved for the most experienced and daring climbers or those who are looking for an extreme challenge.
How Much Does Summiting Mt. Baker Cost
The cost to summit Baker depends on a variety of factors. Whether you choose to go with a certified guide or not, how many other climbers you’re with, and how much gear you need to purchase.
Most trekkers can expect to pay anywhere from $1,000 to $1,500. This includes a fee for guides, permits, food, transport, and gear. Some of these items can usually be rented or are already covered in the price through the company of your choosing. Always be sure to ask what is and isn’t covered in the costs.
If you are attempting to summit Mt. Baker without a guide, then your only overhead costs will be gear (which hopefully as a semi-experienced mountaineer you already own the majority of) and food for the journey.
There are no permits required by the forest service to summit Mt. Baker. This is another huge benefit over Mt. Rainier which requires many permits and lots of red tape.
Do You Need A Guide
It’s very important that you evaluate your prior mountaineering experience before embarking on this technical high-altitude climb. The quick answer is that you don’t need a guide, but there are certainly advantages to having one.
Recommended For Novice Climbers
If you are new to the climbing world then paying for a guided trip is highly recommended, not only for safety but also for the amount of education, proper techniques, and training you’ll receive along the way.
A summit in the Cascades can be highly technical and dangerous. Weather, snowpack, crevasses, and avalanches are just some of the risk factors to consider. With guided tours, camps are pre-set, so your pack can be lighter, usually weighing in at a mere 35 lbs instead of a whopping 55 lbs.
This is another huge benefit of the guided tour. You’ll also have professional guides to make sure your ropes and crampons are secure on the summit climb, that you avoid disastrous icefalls, weather windows are reliable on summit day, and that most of the difficult decision-making like where to place your high camp will be done for you.
Always Have a Climbing Party
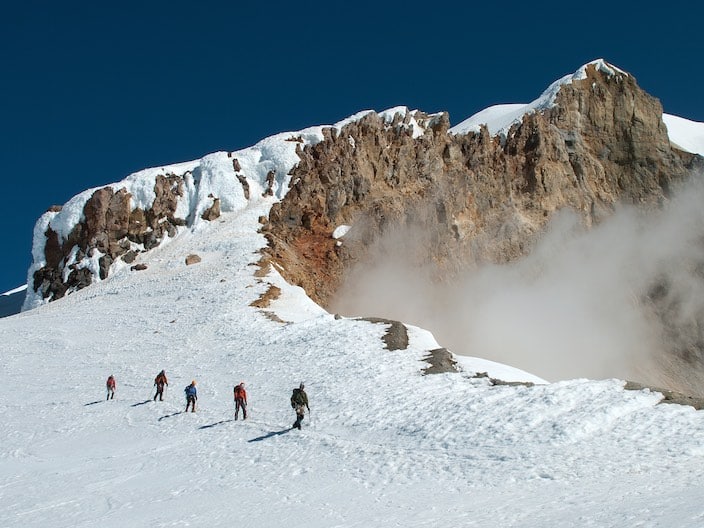
While it is possible to summit Baker without professional guides, it should never be attempted alone. A group of three experienced climbers is the absolute minimum requirement to navigate these highly technical routes successfully and safely.
Recommended Tour Companies
These three tour companies have expert-level climbing experience in this region, great mountain guides, and follow leave-no-trace practices in the mountains.
Alpine Ascents
Leading expeditions in Washington state for 37 years, Alpine Ascents offers expert guides as well as all-inclusive packages covering things like rental gear, most meals, and transport.
Camps are pre-set up so hikers won’t need to bring extra weight in their bags. Itineraries include training and instruction for use of axes, crampons, glacier climbing techniques like self-arrest, and proper rope usage.
They also ensure a 3:1 hiker-to-guide ratio for attentive and individual guidance. Great for beginner climbers.
Miyar Adventures
Miyar Adventures has amazing reviews, a base camp in Seattle, and world-class guides. They offer an economical option for the classic guided 3-day itineraries.
It is often considered “barebones” as here you’ll be setting up your own camp with a guide’s assistance, and you’ll be responsible for more of your own gear too. They also offer 5-day itineraries for those looking to perfect their climbing skills.
Mountain Madness
Mountain Madness is unique in that it offers a slower and more leisurely itinerary for those new to mountaineering or not quite in the physical prime required for 2-3 day itineraries.
In addition, they offer a separate trip to the Coleman Deming Glacier, a three-day trip via the Easton Glacier Route.
Summiting Mount Baker Unguided
If you’re a semi-experienced mountaineer and planning to climb the volcano unguided, here’s all the basic info that you need to know.
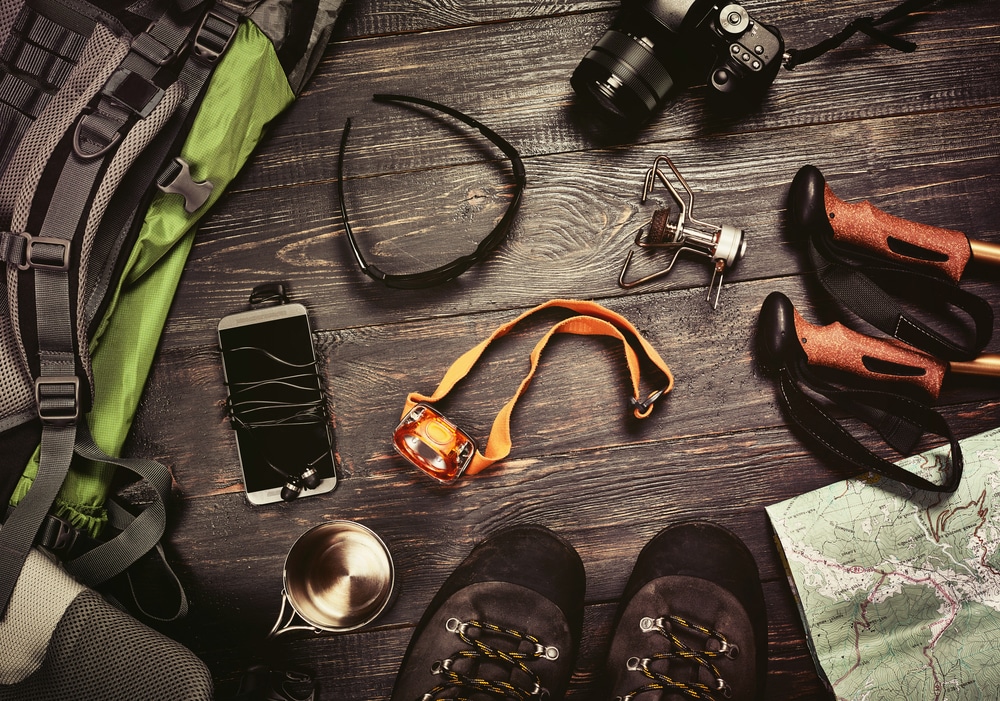
Gear You Need for Climbing Mt. Baker
First things first, a gear check. Let’s make sure you are properly outfitted for what is most likely a 3-day climb.
The gear list is extensive, as with any high-altitude technical climbing. On any multi-day trek, even the most perfect weather can rapidly deteriorate and call for different gear, it’s always best to be prepared for as many wilderness scenarios as possible.
Always remember the outdoors basics like avoiding cotton clothing— does the motto, ‘cotton kills’ ring any bells? Merino wool and synthetic materials insulate your body better and prevent hypothermia from setting in.
Footwear
- Lightweight Trail-runner Shoes for the first and last legs of the trek.
- Double Boots if climbing in May/June/September due to temperature shifts. Many guided companies will have rentable plastic double mountaineering boots offered.
- Single Boots for July or August climbs. This is regarded as the best weather for the climb.
- Crampons. All routes to the summit require glacier travel, and therefore, crampons are a must.
- Hiking Socks 2-3 pairs.
- Gaiters. Full-size waterproof gaiters that fit over your boots. Some boots have built-in gaiters.
Clothing
- Underwear (2 pairs).
- Thermal base layer bottoms.
- Softshell Pants.
- Hardshell (waterproof) pants.
- Long sleeve sun shirt (with hood). Snow is like a giant mirror for sunlight. Protecting yourself from harmful UV rays can’t be stressed enough.
- Second long-sleeve baselayer top. Temperatures can drop rapidly, and your one sun shirt may not be enough insulation.
- Midlayer fleece top.
- Softshell Jacket that is both lightweight and breathable.
- Hardshell (waterproof) non-insulated jacket.
- Insulated synthetic puffy coat.
- Sun hat. Baseball style or bucket styles work.
- Beanie/ski hat. A non-cotton hat to cover ears for warmth.
- Buff. This is a multi-purpose UV neck and head protector.
Handwear
It’s important to keep your hands functioning, which means toasty warm. Having a variety of protection depending on the temperature and weather is highly recommended.
- Lightweight liner gloves.
- Softshell gloves. For when liners are not warm enough, but mittens are cumbersome
- Waterproof mittens. Make sure your liner gloves can fit inside these.
All the Rest
This is the plethora of other items you should bring with you on your climb.
- Ice ax (unleashed): many tour companies issue rental axes, but it’s a good tool to have for worst-case scenarios.
- Climbing helmet.
- Headlamp.
- Glacier Glasses. Preferably ones with side protectors.
- Ski Goggles. Choose ones with a VLT of no more than 30%
- Backpack. Waterproof 55-75 liter.
- Climbing Harness with locking carabiners.
- Inflatable sleeping pad.
- Sleeping bag (20 degrees F minimum).
- Water bottle.
- Water purifier tablets.
- Sunscreen (zinc oxide preferably). Be sure to purchase a new tuba, as SPF quality diminishes over time, so a fresh tube is always best.
- Lip balm.
- Bowl with utensil(s). Long stems are easier to use with gloves, and collapsible bowls pack easier.
- Tent (if going unguided). If you are planning on joining a tour, this will likely be provided for you.
- Contractor’s bag. For your waste and trash.
- Disposable waste kits. There are no toilets on the glacier, all waste must come back down with you.
- Small first aid kit.
- Earplugs for quality rest.
And, of course, food. Make sure that you plan out the appropriate calories needed for the amount you’re burning each day. What exactly you decide to pack with you to meet that calorie intake is up to you.
Training and Preparation

High-altitude climbing is extremely physically taxing as well as mentally taxing. Training is obviously highly recommended before attempting anything like summiting a 10,000-foot volcanic mountain.
Not only do you need flexibility and strong muscles, but the higher up you get, the air gets thinner. In these conditions, it’s important to keep your thinking and decision-making clear.
This is why it’s highly recommended that you embark on some other high-elevation hikes to acclimatize as best you can. Cardiovascular endurance and leg strength are above all, the most important, as well as being able to easily carry a 30-50lb pack on your back while walking up steep slopes of ice.
Here are some recommended training exercises.
- Hike around 8-10 miles a week with around 3,000-5,000 ft gain.
- Be able to carry a 40lb pack up 2,000 ft of gain in under 2 hours.
- Run 10 miles per week for endurance and lung capacity.
You should allow yourself 3-6 months to get your body and mind in shape to be able to maintain the physical exertion and mindset necessary.
This will keep you and your team safe and keep you out of risk of injury, or from slowing the group down. Many tour companies will even require you to hit certain ascent goals, and if they are missed, you will not be allowed to advance to the next stage.
How Long Does it Take to Summit Mt. Baker
Many routes take anywhere from 2 to 3 days, depending on skill level, group size, and weather. Anticipate three days on the mountain.
Day One
Typically day one is spent driving to the Schriebers Meadow Trailhead (depending on the route you’ll be taking), followed by a 3 to 5-hour ascent to Sandy Camp, where you’ll cover 3,000 feet of elevation gain in just over 4 miles.
Here, you’ll unload most of your gear, set up base camp, and prepare for a summit the next day.
Day Two
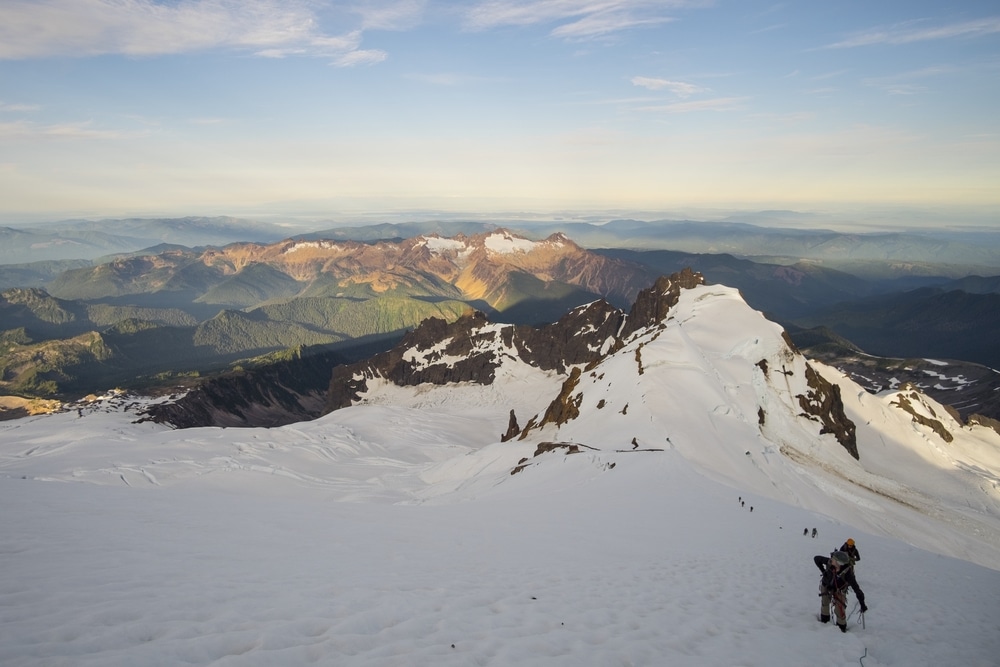
Day two begins before dawn. You’ll navigate over the glacier and reach the summit by mid-morning, enjoy the views, and hike back to camp.
Novice climbers usually can reach the summit in 5-6 hours. After enjoying the breathtaking views on top of the northern Cascade range, it is possible to hike back down all the way to the trailhead if you still have the energy to do so.
Day Three
On three-day trips, if guided, the afternoon of day two is spent learning and practicing glacier climbing techniques and rescue and safety skills.
Here you spend the night either above the glacier or at its base before waking up the next morning and heading back down to the trailhead.
Unguided three-day trips allow for one more night camping on the slopes of the mountain and more relaxation rather than straight exertion.
The Most Popular Mt. Baker Climbing Routes
As with most alpine climbs and summits, there are many routes to the top, each with varying degrees of intensity, challenges, expertise requirements, and benefits.
The Easton Glacier Route
The Easton Glacier Route is widely considered the most approachable and easiest route up the mountain. It is, therefore, also the most popular route and easily doable for novice and beginner mountaineers. This route generally takes three days, but more experienced mountaineers can easily complete it in two days.
The Coleman Deming Route

The Coleman Deming Route, although popular in the alpine community, is also more challenging than the Easton approach. Summiting here from the south, you start off at the same trailhead (Schreibers Meadow Trailhead) as the Easton Glacier Route. We’ll call this the intermediate route up the mountain.
Heliotrope Ridge Route
Approaching from the North Ridge, the Heliotrope Ridge Route should be attempted by intermediate and experienced climbers only and usually takes three days.
Unlike the other routes, this one starts off from Heliotrope Ridge trailhead and heads to the base of Coleman Glacier. On the second day, you cross snowfields to Colfax Col and from there up to the summit plateau.
From here, you descend slightly to Sherman Camp, where you sleep for the night. The next day requires a 3 to 4-hour ascent of the steep and daunting Roman Wall, where you push to the summit and then back down to camp and on to the trailhead.
Not Quite Up For The Challenge? Try One of These Breathtaking Hikes Instead
High-altitude alpine climbing isn’t for most of us. Honestly, it’s only for those select few with a bit of an inclination toward adrenaline-seeking.
Whether you’re looking to work your way up, find a challenging non-technical alternative, or just take a stroll through the lovely landscapes of the North Cascades beyond Bellingham, the surrounding Mt. Baker area is stock full of trails, peaks, lakes, and nature for you to explore.
Hannegan Pass and Peak
One such option for those looking to push their bodies and leave their hearts working overtime is the Hannegan Pass and Peak hike, which features 10.4 miles of 3,300 ft elevation gain.
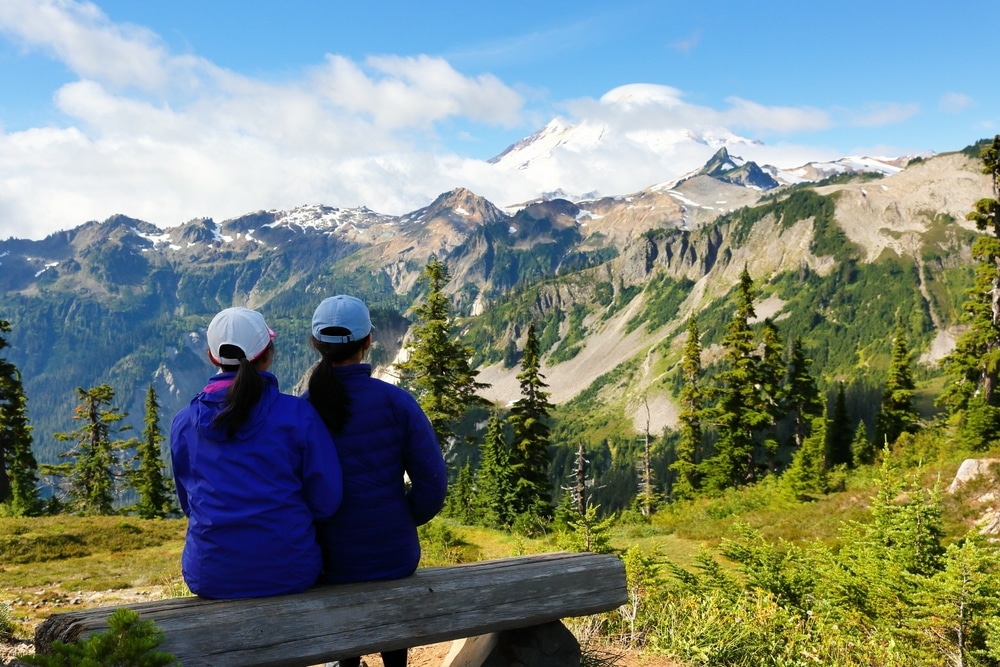
If you’re determined to push yourself mentally and physically but aren’t quite ready to conquer glaciers and navigate crevasses, Hannegan will give you rewarding views of the high peaks of the North Cascades as well as Mt. Baker itself.
Yellow Aster Butte Trail
Yellow Aster Butte Trail is 7.5 miles with a whopping 2,550 ft elevation gain. Difficult. This is a great option for a challenging hike and consistently rewarding with amazing views of peaks, valleys, and unparalleled fall foliage.
Chain Lakes Loop Trail
The 7.5-mile Chain Lakes Loop Trail is totally closed during the winter months when the road to Artist Point becomes too treacherous to pass. But in summer, this trail is one of the most popular in the mountain range. For good reason.
View the Pacific Northwest from Above
Although summiting Mt. Baker is reserved for only the boldest of travelers, the region is absolutely bursting with outdoorsy activities.
From the hikes listed above to simple scenic drives along the Mt. Baker Highway up to Artist Point. Views of the volcanic mountain, Sherman Crater, and black buttes are just too beautiful to miss.
Your visit to the PNW is bound to be filled with thrilling outdoor adventure— and if you attempt this astounding summit— it’s likely to be one of the most impressive vistas you’ll ever experience. To help find a place to rejuvenate after your summit, look no further than these stunning vacation homes.